Recipe Review: Italian Herb Bread

I spent most of Sunday baking.  First I tested a new bread recipe (see previous post on the Vermont Whole Wheat Oatmeal Honey Bread recipe). Terry and I wanted to have Italian for dinner, so I decided to make some Italian herb bread.  I reviewed my two ‘stand by’ recipes, Italian Supermarket Bread and Rosemary Sourdough, and decided I really needed to program my Zojirushi for a custom dough cycle (less kneading, more rising).  I couldn’t find the print edition that I received with the BB-CEC20 bread machine (I filed it away with all the other appliance manuals), so I downloaded a searchable copy (aka as a PDF file).

As I paged through the “How to Enjoy Your Home Bakery Supreme Breadmaker Operating Instructions and Recipes” for the Zojirushi Model BB-CEC20, I got distracted by the recipes listed under the Basic Course.  Continue reading “Recipe Review: Italian Herb Bread”

Recipe Review: “The Easiest Pizza You’ll Ever Make by King Arthur Flour” (5 stars)

Recipe: The Easiest Pizza You’ll Ever Make: King Arthur Flour.

Rating: 5 out of 5 stars

Baked: January 27, 2014

Home Made PizzaMy most recent order from King Arthur Flour (taking advantage of one of their frequent free shipping promotions) included their Pizza Dough Flavor.  Since I wanted to take advantage of this new seasoning, I didn’t use my standard pizza crust mix found in King Arthur’s 200th Anniversary cookbook.  Instead, I searched through the recipes available at King Arthur’s website and decided to try the one listed above.

I cut the recipe in half, just like I do the one from the cookbook, because my husband and I don’t need to make two or three large pizzas.  One large one is plenty for a couple of meals.  I also don’t let the dough rise but for a few minutes, long enough for me to heat the oven up to 450 degrees.  Terry and I prefer thin, crispy crusts so rising is never a necessity.

Continue reading “Recipe Review: “The Easiest Pizza You’ll Ever Make by King Arthur Flour” (5 stars)”

Baking Up a Storm (Winter Storm Q That Is).

Let It Snow!
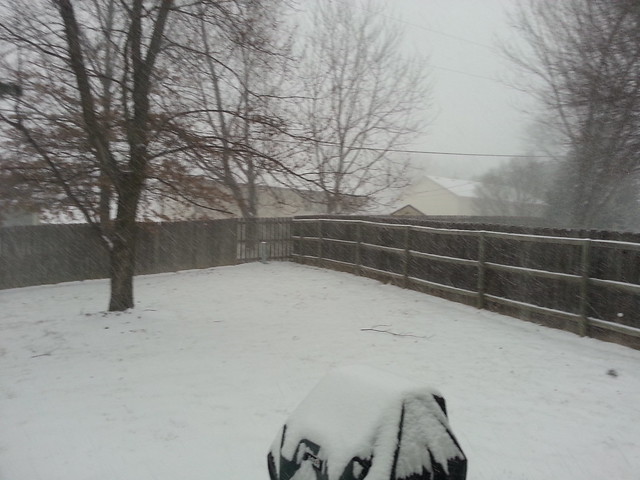
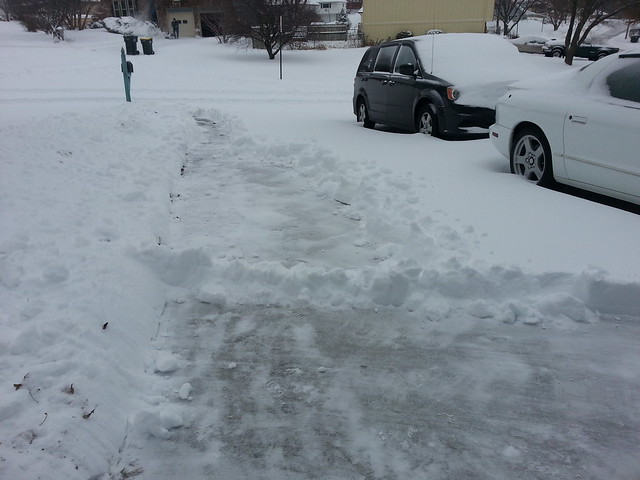
I didn’t get quite as much done domestically as I’d hoped yesterday during my ‘snow day‘ home courtesy of Winter Storm Q.  I should have been baking bread all day long.  Instead, I ended up working from home for the first half of the day and then working like a dog outside my home shoveling the ten or so inches of snow off of my driveway and onto my front yard.

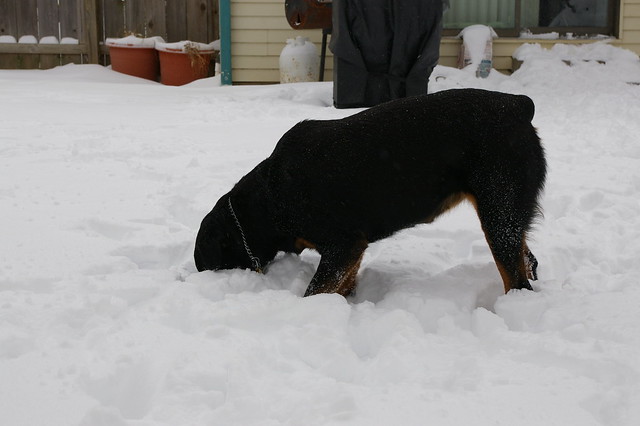
Speaking of dogs, Apollo and Lexy had fun chasing each other through the back yard snow drifts and digging for dog treats that Terry tossed from the patio door out into the snow.  Lexy was bound and determined to find every last one:

Rottweilers Playing in Deep Snow

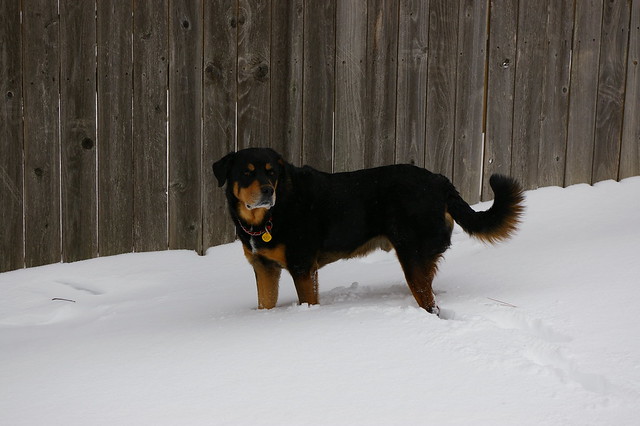
Apollo preferred to charge through the snow at top speed. He bowled Lexy over at least once. Here he is returning to me at a dead run:

Rottweilers Playing in Deep Snow

Here he is standing more or less still, breaking new ground through the snow soon after I let them out for the first time:

Rottweilers Playing in Deep Snow

But Lexy was the cutest for the camera yesterday:

Rottweilers Playing in Deep Snow

Early Thursday morning, before anyone was up yet, including Apollo and Lexy, I set out the frozen remains of our last chicken pot pie extravaganza to thaw. I went searching for the pastry crust recipe I usually use but instead I reached for my favorite baking cookbook, the King Arthur Flour 200th Anniversary one (pictured at right).  I began reading through their ‘pastry primer’ section and found a simple recipe that sounded like a good fit for what I wanted to do around lunch time.  I’ll have to update this post later with the exact page number and title of the recipe, but here are the ingredients and instructions (from memory):

  • 2 1/2 cups King Arthur All-Purpose Flour
  • 1/2 cups King Arthur White Whole Wheat Flour
  • 1 tsp salt
  • 1/2 cup vegetable shortening (aka Crisco)
  • 1/2 cup (or 1 stick) butter
  • 1/2 cup buttermilk

Combine the dry ingredients in a bowl.  Cut in the shortening (I used my handy-dandy pastry cutter) until crumbly.  Cut in the butter (again using the pastry cutter) until the pieces are the size of peas.  Pour in the buttermilk and quickly mix it in.

I covered my countertop with a couple of sheets of plastic wrap.  I divided the dough in two and folded the resulting piles into a mostly coherent lump.  Then I folded the plastic wrap over it, pressing it into a squarish-lump.  I repeated this for the second pile of pastry.  Then I placed the wrapped dough in the refrigerator for a minimum of thirty minutes.

Around lunch time, I preheated the oven to 375 degrees and used some mini-loaf pans to put the chicken pot pie filling and gravy into.  I took one of the dough packages out of the fridge and rolled it out.  I used a spare mini-loaf pan as a template to get the right size for the pastry crust top.  I should have used an egg white wash as glue, but I didn’t want to waste an egg, so I just pinched the edges of the crust to the pans.  I used a knife to cut some slits in the top.  For my husband’s pie, I cut out an extra bit of crust to form a “T” for his name (Terry).  I placed the pans on a baking sheet and baked them for 30-40 minutes.

I pulled them out of the oven and let them cool for 5-10 minutes.  When I pushed my spoon through the crust on my pie, I could tell immediately that I had a winner.  Very flaky crust!  And the filling wasn’t bad either.  The perfect lunch while we hunkered down to wait out Winter Storm Q.  My helping kept me warm while I shoveled the driveway clear after lunch.

Shovelling

Now I just have to figure out what to do with the other half of the pastry dough. I’m fresh out of chicken pot pie filling.

Cracked Honey Wheat Bread

Other ingredients1 1/4 cups boiling water
1/4 cup cracked wheat

4 T canola oil (or butter/margarine)
4 T honey
1 cup KAF White Whole Wheat Flour
2 cups KAF Unbleached Bread Flour
1 T vital wheat gluten
1 1/2 tsp sea salt
2 tsp yeast

∞∞∞

Cracked wheat soakingUsing my bread machine, I placed the boiling water in the bread pan first with the cracked wheat to soak (min of 30 mins) while I gathered the other ingredients.  I added the honey and oil to pan.

Ready to mix∞∞∞

Then I added the dry ingredients, except for the yeast.  I made a crater in the mound of flour mixture and placed the yeast carefully in the crater.

I set a delay on my dough cycle (my bread machine includes a 20 min preheat feature I can add for all programmed cycles) and let the machine do the rest.  I prefer to back my bread in my oven, rather than the machine, so I almost always use dough cycle.

My Precious
My Precious (click image for rest of album)

[flickr video=8350532602 secret=d75c012cf5 w=400 h=327]

Once the cycle completes, remove the dough from the pan, shape it and allow the dough to rise, covered, for about 1 hour, or until it’s crowned about 1 inch over the rim of the pan. Bake the bread in a preheated 350°F oven for 35 to 45 minutes, or until an instant-read thermometer inserted into the center of the loaf registers about 190°F. Remove the bread from the oven, turn it out of the pan, and let it cool on a wire rack.

∞∞∞

Check back in a couple of hours for updated photos and the results of my bread dough epiphany.

Cooling on rack
Cooling on the rack

Recipe Test: Stromboli (via King Arthur Flour)

Stromboli: King Arthur Flour Recipe

My daughter continues providing meals to her father (and I benefit as well).  One of her suggested menu items happened to be stromboli.  She called her boyfriend last night for the recipe, but he had a bad day at work so supper at the Moss Home quickly became leftovers.  Rachelle called me later while I was out at the grocery store picking up items for today’s return of the chicken pot pie.  She needed French bread to make her stromboli.  I told her I needed a minimum of three to four hours to make that type of bread.  I asked her if I could make some French bread on Sunday afternoon so she could make the stromboli on Monday.  She agreed and eventually left to spend the evening (and night) with friends.

Monday morning, I reviewed the stromboli recipe via the King Arthur Flour web site.  I placed the ingredients for the dough in my bread machine and added time to the dough cycle so that the dough would be ready for Rachelle around 4:30 p.m.  I went merrily off to work and called her at 3:00 p.m. to make sure the bread machine started on time and that the dough looked like it should.  She told me it looked great and smelled wonderful.

Our Stromboli looked very much like this one (sorry, I forgot to take a photo of ours)

I got home at my regular time and the stromboli was already baking in the oven on parchment paper on the pizza stone.  The house smelled glorious.  Within a half hour, we took the baked stromboli out of the oven and let it rest and cool for ten to fifteen minutes.  I sliced it while Rachelle heated up some marinara sauce.  We each enjoyed at least two slices, if not three.

Later, after we’d stuffed ourselves, Rachelle realized she should have let the stromboli rise before baking it.  Neither of us had thought about that and had not allowed for that second rise time in our evening dinner planning.  Next time, we’ll definitely let the stromboli rise for at least a half hour or longer.  This recipe is a keeper!

Sticky Buns

I am thankful to have made it safe and sound through two states to visit my children.  So, for my twenty-third installment of ‘Thirty Days of Thankfulness,’ I wish to share their (and mine) perennial favorite:  Sticky Buns (follow the link for the recipe and detailed instructions with photos).

Nearly the first thing I did upon arriving at my daughter’s apartment was to inventory her pantry and then head to the largest Kroger grocery store in the state of Texas.  As expected, since it was early evening on the day before Thanksgiving, the aisles were jam packed, especially the baking aisle.  We survived with most of our limbs intact and only forgetting one item, which we had forgotten to place on our grocery list.

Once back at the apartment, I installed my old bread machine and began mixing up a batch of the sticky buns, using the dough setting on the bread machine.  Since it was close to eight o’clock, I knew I would be up way past my bedtime.  While my husband and daughter’s boyfriend headed over to a friend’s house who had graciously agreed to smoke a turkey for us, Rach3elle and I streamed a couple of old Star Trek: Voyager episodes from the sixth season, ones I didn’t remember but were quite interesting none-the-less.

We decided to go ahead and bake the first batch of sticky buns last night, using my daughter’s large 9×13 inch glass baking dish.  I wasn’t completely satisfied with the way the dough mixed and rose, so I wanted to be able to test taste it in case I needed to re-do a batch early in the morning.  Another strange new experience for me: cooking with gas.  My daughter’s kitchen apartment includes a Hotpoint gas range.  I have only ever cooked using electric ovens.  Interesting.

The sticky buns came out of the over around 11:30 but when we flipped them over onto a large cookie sheet, several rolls around the edges stuck to the sides and came unraveled.  Prime targets for a taste test.  The results were superb but I would need to make another batch in the morning to fine-tune the recipe.  While I had purchased what I thought was non-fat dry milk at the grocery store, it was actually labelled ‘instant’ (I really should where my reading glasses while shopping), so I put an eighth to a quarter cup of half-and-half in the liquid portion of the recipe.  This morning, I decided to forgo any dairy aspect of the recipe and the dough does look like it is rising better.

I sometimes make this recipe up for friends and family, but I don’t bake it for them.  I send them a batch in a disposable aluminum foil pan with instructions on refrigeration, rising and baking so that they can enjoy this treat fresh out of the oven, sticky, gooey and hot, just like it’s meant to be enjoyed.

Happy Thanksgiving Everyone!