Two years ago, I made Apple Chutney from the fresh apples I picked off my own apple tree. My daughter loved it and just recently used the last can from that year.
This year, I modified the recipe slightly (see below):
Apple Chutney Recipe
2 quarts (64 ounces) apples (peeled, cored, chopped)
2 teaspoons lemon juice
2 lbs. golden raisins
4 cups brown sugar, firmly packed
1 medium onion, finely chopped
1 green bell pepper, finely chopped
2 red bell peppers, finely chopped
1 clove of garlic, crushed
2 1/2 tablespoons mustard seed
2 tablespoons ginger
2 1/2 teaspoons ground allspice
1 teaspoon curry powder
2 teaspoons table salt
4 cups (32 ounces) white vinegar
In my stock pot, I poured in the vinegar and added the brown sugar. I turned on the burner to a simmer setting. I chopped up the vegetables and added them to the stock pot. I crushed the garlic and grated the ginger and added that to the stock pot. I stirred it up. Then I started adding the spices. I got to the last one (curry) and got carried away, adding an extra teaspoon (twice as much as the recipe called for) so I added a half teaspoon more of allspice to counterbalance. I stirred it up again and got to work peeling, coring and chopping apples.
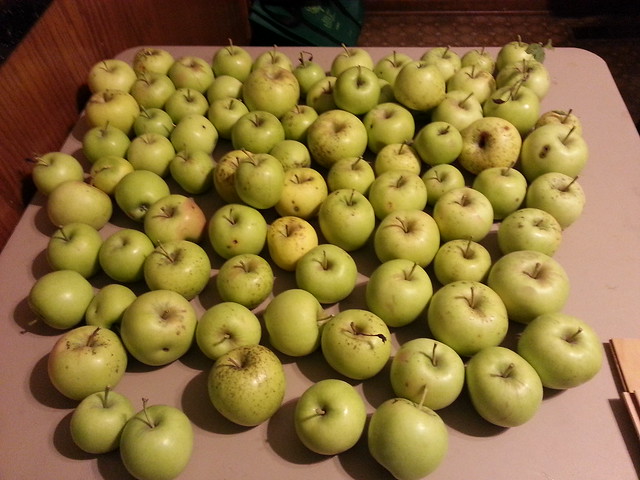
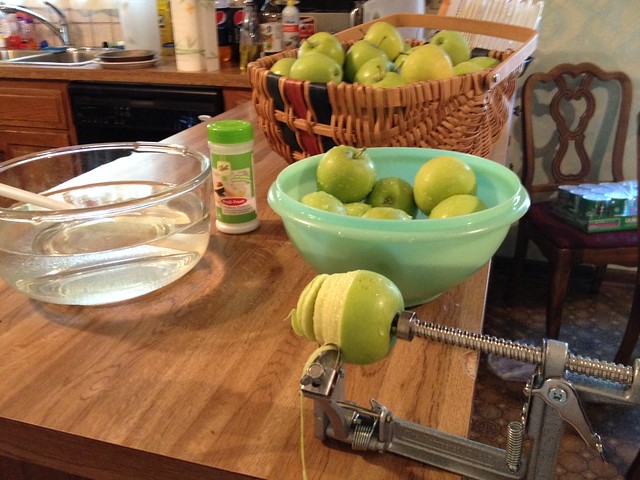
A few dozen apples from our apple tree this season, ready to be preserved.
I picked out seven medium to large sized apples and washed them. Then I peeled, cored and chopped them. I added them to the stockpot and stirred it all up. Then I picked 4-5 of the small apples and washed them. Rinse, repeat.
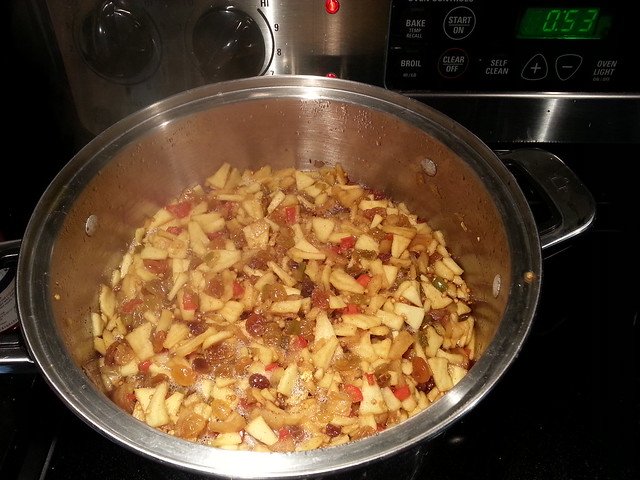
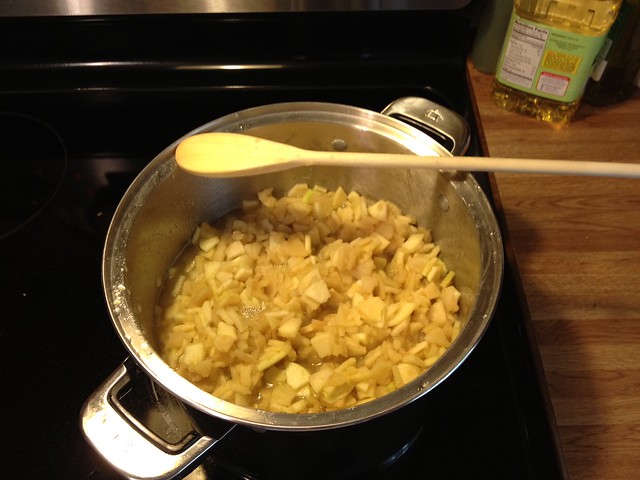
Apple chutney simmering in my stockopt.
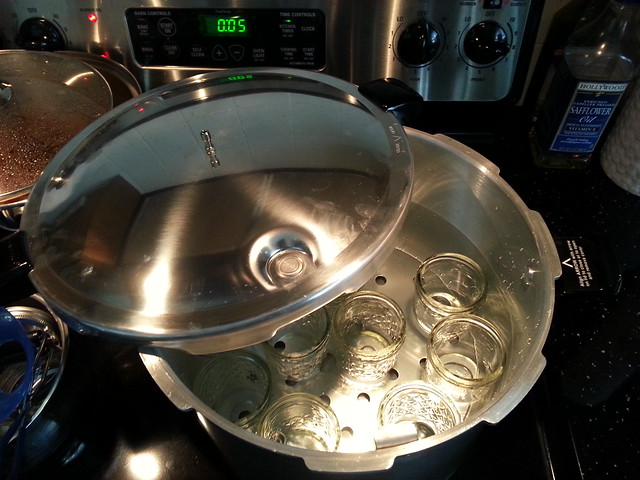
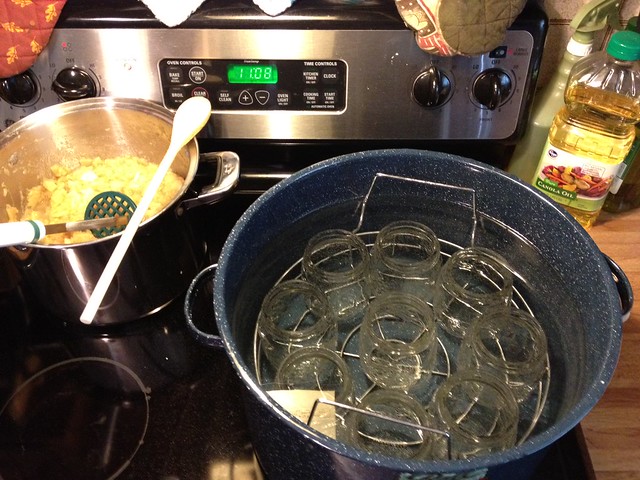
Now I need to prep my brand new 16-quart pressure canner. This required taking the seal out of the lid and washing the lid, pan and seal in hot soapy water. It’s almost too big to fit in my sink! Once I got it rinsed and dried, I returned the seal to the lid and poured in a couple of gallons of distilled water. Then I turned the burner on medium-high to start the long process of heating up the pan and the water. Finally, I placed the clean empty lidless jars in the water so they would gradually rise in temperature and become sanitized. I started a smaller pan with a half-gallon of distilled water on medium-low heat and placed the lids and bands in it.
New pressure canner
The canner can process a dozen of the Ball Quilted Crystal Jelly jars (half pint capacity), which is what I use to preserve the apple chutney. My daughter, for whom all this effort is expended, prefers that size to use when cooking for two. I processed through most of the simmering apple chutney and sealed up the canner. I cranked up my largest burner to its highest setting and set 20 minutes on the timer.
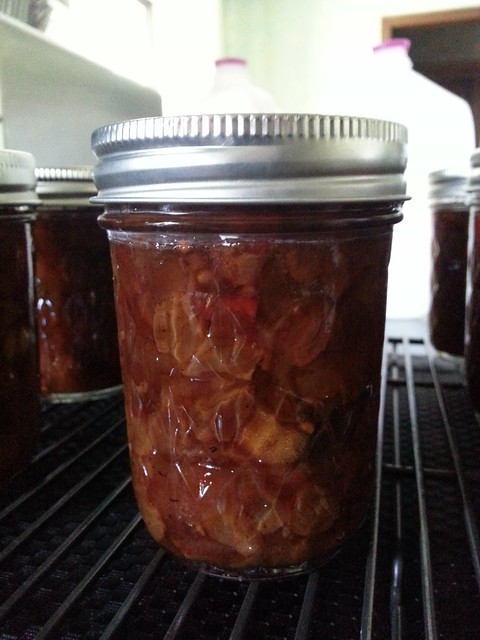
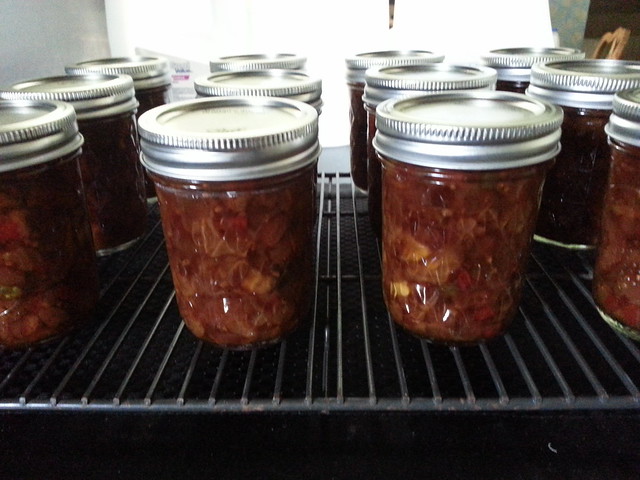
First batch finished – Apple Chutney (Autumn 2014)
I had enough apple chutney after the first batch to fill four more half-pint jars. The canner has a roiling boil on for those last four lonely jars.
So the above recipe produces sixteen half-pint jars. Or 128 ounces. Or one gallon of chutney.
In addition to all the applesauce I created last weekend, I tried my hand at some strawberry jam. I selected a recipe that used apples as well as strawberries, and a bit of lemon (and lemon seeds). Here’s a link to the blog post where I found the strawberry jam recipe: “Through My Kitchen Window: Strawberry and Apple Jam.” I doubled the recipe, but should have refrained from doubling the water. It took hours to reduce the strawberries, apples and water down to the proper jam consistency. I also added a bit of low-sugar/no-sugar pectin, when I began to wander if the jam would ever, well, jam. An entire afternoon spent babysitting the stockpot resulted in four half-pints of strawberry jam. I guess I’ll find out later if all the effort was worth it.
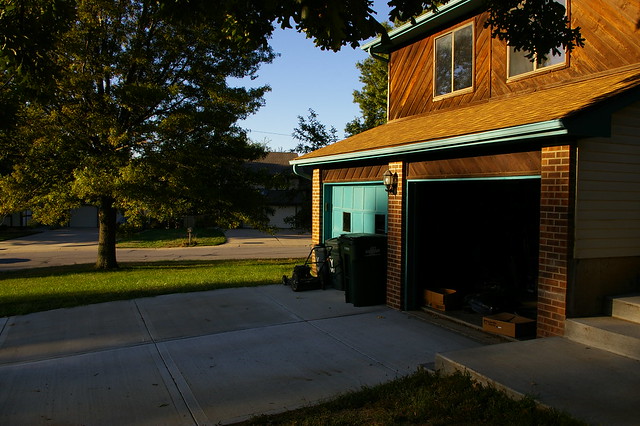
Unlike the previous two Saturdays, I didn’t immediately jump out of bed yesterday and begin peeling, coring and slicing apples. Instead, I threw myself into de-junking our garage. My husband snagged some new(er) garage doors this week, rescuing them from death row and a permanent burial at the local dump. Compared to our existing garage doors, they look nearly brand new. With the time-table on the garage door project drastically moved up (we had planned to buy new garage doors next year, probably during the summer), we needed the front half of the garage cleared out. Terry scheduled the installation for next weekend, and before then he needs to paint the doors to match our trim color.
I gingerly opened the southern side garage door, hoping it would hold together well enough to roll up and not fall on my head. I needed that door open so I could get to twelve years worth of accumulated junk, some of which had not been seen or touched since we moved into this house in February 1999. I set my camera up under my large oak tree in the front yard so I could take some time lapse photos of this endeavor (click photo below for slideshow):
After spending all day on my feet, to the tune of over 15,000 steps (according to my pocket pedometer, which I accidentally reset by bending over and lifting too much), I decided I needed to stand around some more, this time in a dark field gazing up at the stars and planets. I even invited my dad to come along for the ride to Powell Observatory (more on that outing in an upcoming post).
I laid my head on my pillow some time during the one o’clock in the morning hour. I did first warm myself up in the hot tub with Terry. I wanted to be able to feel my fingers and toes again before I fell asleep. My back and knees thanked me, at least while I stayed in the hot water.
Sunrise brought stiffness and soreness. I took it easy, brewing some Irish Blend tea to help wake up my brain. Terry had been up all night, visiting the hot tub two more times thanks to his back. Since he was up, I whipped up some sausage gravy and biscuits for breakfast. He attempted to watch the Singapore Grand Prix race, but soon succumbed to a food coma and retired upstairs to sleep it off.
With Terry upstairs, I could move freely about the kitchen without worrying about making too much noise (and waking him up). I began peeling, coring and slicing all the apples I had in the kitchen. I filled my stockpot up about halfway when I ran out of already picked apples. I grabbed my large basket and went out to forage for fresh apples. I came back in with a full basket and selected eight or ten large good ones. I set those aside to be used in the second apple pie of the harvest.
I prepared another dozen or two apples and filled the stockpot up nearly to the top. I moved it from the front right burner to the back left burner, so I could put the water bath canner on the large front burner. I selected nine pint jars and placed them in the canner. I began filling the pints with distilled water and then continued filling the canner with distilled water until all the jars were immersed and covered with at least an inch of water. I turned the burner up to medium high heat to begin the long process of heating the water and jars to nearly boiling temperature.
I let the stockpot simmer for a half hour or more, taking the chance to relax, read part of a book and write a blog post. I transferred hot mushy apples to the glass blender jar and pureed them four cups at a time. When I reached the bottom of the stockpot I had nearly twenty cups of applesauce. Success! I had enough to fill all nine pint jars in the canner! I returned the applesauce to the stockpot. I squeezed a fresh lemon and added the juice to the stockpot.
I planned to spice up this batch of applesauce for my kids. Derek and Rachelle both love cinnamon apple sauce. I began with two tablespoons of cinnamon. After I stirred in the spice, I tasted it, but couldn’t really taste anything different. I took a spoonful to Terry and he agreed I should add more cinnamon. I added another tablespoon and tasted again. I got a hint of cinnamon. I took Terry another taste. He thought there was enough spice. I added a half cup of sugar and tasted again. There, I could taste the cinnamon with the aid of the sugar.
I processed all the pints in the canner, filling them as recommended, leaving a half-inch of head space. I cranked up the heat to high and put a timer on for ten minutes. When the alert sounded, I checked the canner’s interior to confirm a roiling boil, then added another ten minutes to the timer. At the next beep, I turned off the burner and removed the canner from the heat source, leaving the lid off to help cool down the contents gently. I came back an hour or so later and placed the jars on the rack to cool overnight.
This week I plan to make at least one apple pie (the second one of the harvest season) and more apple butter. I only have four pint jars left, but several half-pints are waiting to be filled with either butter or chutney. My daughter called to let me know she tried the chutney with some pork and loved it.
The apple tree still has plenty of apples ripening on it’s limbs. I’ll keep picking them until the tree is bare. Unless I buy another dozen pint jars, though, I’m probably done making applesauce this harvest.
Sunday morning I began my quest to create and preserve applesauce. I’d spent Saturday creating apple butter and apple chutney. I just wanted to use as many apples as I could to provide space for even more apples that needed to be picked from our tree. I had baskets, boxes and counters covered with apples. The best way to make more room was to reduce them to mush.
I began peeling, coring and slicing apples shortly after sunrise. I got into a good rhythm, finishing an apple every couple of minutes. After I finished a dozen apples, I transferred the chopped remains to the stockpot, which I had on a medium-low heat to begin the mush-down. I stopped at four dozen apples, and about ninety minutes after I started, I could finally sit down and give my back and feet a break.
I decided to stick to the basics and followed the applesauce recipe found at the Ball Fresh Preserving web site. The only change I made to the recipe was adding a dozen apples, because some of the apples from my tree are less than medium sized. I turned the heat up to medium on my stockpot and sat down to write a couple of blog posts, while the pot thickened. Muhahahaha!
After a couple of hours, I took a potato masher to the simmering apples. I also moved the stockpot to the back left burner to make room for the waterbath canner on the front right one. I placed the recently washed pint jars in the room temperature water in the canner and turned that burner on high enough to get it boiling. I returned to mashing my apples into a warm pulpy mess. Strange how satisfying something so simple can be.
I didn’t want my first batch of applesauce to be of the chunky variety, so I gave up on my potato masher and switched to my blender. I’m glad I insisted on buying one with a glass jar. I prefer glass whenever possible (as you can see to the left). When my first mixer died (decades ago) I kept both mixing bowls that came with it because they were made of heavy glass (see above). I’ve also kept a Lipton Sun Tea jar I bought in the 80s because it is a true gallon sized jar and despite being dropped more than once since, it bounces and remains unbroken. Very heavy when full of iced tea, but I love that glass jar.
I pureed the boiling hot mashed apples in my blender and made a note of how many ounces on the side of the jar before pouring them into my mixing bowl. After three or four trips through the blender, I reached the bottom of my stockpot. I totaled up my ounces and had one hundred and eight ounces. Dividing that total by sixteen got me just short of seven pints. Rats. I should have peeled, cored and sliced up another dozen apples so I would have had at least eight pints. I made note for future reference so that the next time I do this, I’ll use more apples.
I poured the pureed applesauce back into the stockpot and turned the burner down to a low heat to keep it simmering. I reviewed the recipe for the amount of sugar I needed to add, but first I took a sample spoonful to Terry to taste. I asked if it needed sugar and he agreed it did. First, though, I took a fresh lemon and squeezed it to put a quarter cup of lemon juice into the sauce. I took another spoonful to Terry to taste test. Better, but no sweeter. I then put in the suggested three cups of sugar and had Terry taste again. Too sweet. Argh! He suggested that next time we taste after adding one or two cups and then tasting.
I had lids warming up in a small saucepan and the jars ready to be filled. Let the preserving assembly line commence!
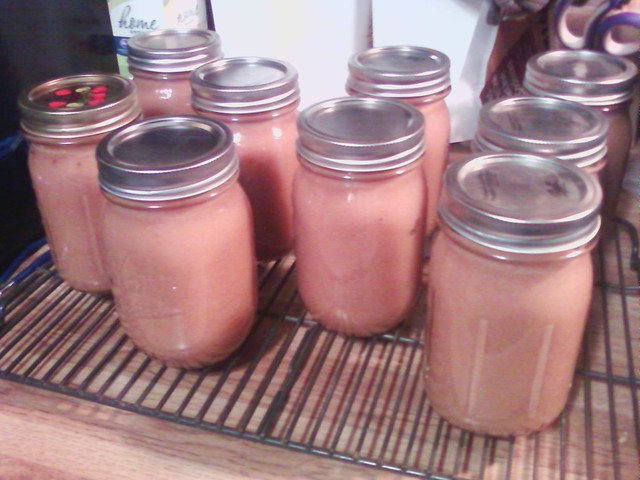
According to the Ball applesauce recipe, I needed to leave one-half inch of head space at the top of the jar. Using Terry’s measuring tape, I made a note of where to fill each jar to and began processing the sauce into jars. Before long I had seven jars capped and in the canner. I took out the two spare jars and replaced one of them with a half-pint of apple chutney left over from the day before. I cranked up the heat and returned to my laptop to write yet another blog post while waiting on the unwatched pot to boil. The recipe required twenty minutes at full boil, so as soon as I saw steam, I set the stove’s timer and relaxed for a bit.
I cleaned up the kitchen to make room around the stove for a cooling rack and so I could move the canner off the front burner once the boil time expired. The jars rested in the canner for a few minutes before I removed them to the rack to cool for twenty-four hours. Just as before, as I removed the jars from the canner and placed each one on the rack, I could see and hear the lid popping as it sealed down. Three batches and not a single unsealed jar yet. Not bad for a rank amateur preservationist.
I took a break from canning for a couple of hours during the middle of Saturday. My leftover unused jars, though, accused me from the counter top and cried ‘fill me, fill me!’ I didn’t want to do another batch of apple butter yet, so I began searching for other canning recipes that used apples as the primary ingredient. I found a couple of chutney recipes (What is apple chutney and how would you use it?) that looked interesting. The first one came from a canning web site called SimplyCanning.com and provided instructions not only for making the chutney, but how to preserve it as well. The second recipe I found on the FoodNetwork.com web site and wasn’t designed for a large batch intended to be canned.
I reviewed both recipes and made a grocery and supplies list. I left the house and dashed to the grocery store to grab the items I didn’t have on hand in my pantry. I picked up dozen pint-sized jars just in case.
Once back home, I started chopping up the ingredients I wanted to include in my mashed up merging of the two chutney recipes (see below). I dumped everything in my large stockpot and got it boiling to begin cooking it down. I turned the heat down a bit too much, and ended up simmering the ingredients slower than I could have. After a couple of hours, I turned the heat up a bit and finally got the chutney reduced down and thickened. Then, all I had to do was keep the chutney warm so I could fill up the sanitized half-pint jars and place them in the water bath canner for sealing.
Apple Chutney Recipe
2-3 dozen apples (peeled, cored, chopped)
2 tablespoons lemon juice
1 lb. golden raisins
4 cups brown sugar, firmly packed
1 medium onion, finely chopped
1 cup sweet red peppers, finely chopped
1 clove of garlic, crushed
2 tablespoons mustard seed
2 tablespoons ginger
2 teaspoons ground allspice
1/2 teaspoon red pepper flakes
2 teaspoons kosher salt (fine ground)
2 cups apple cider vinegar
1 cup fresh squeeze orange juice (2 oranges)
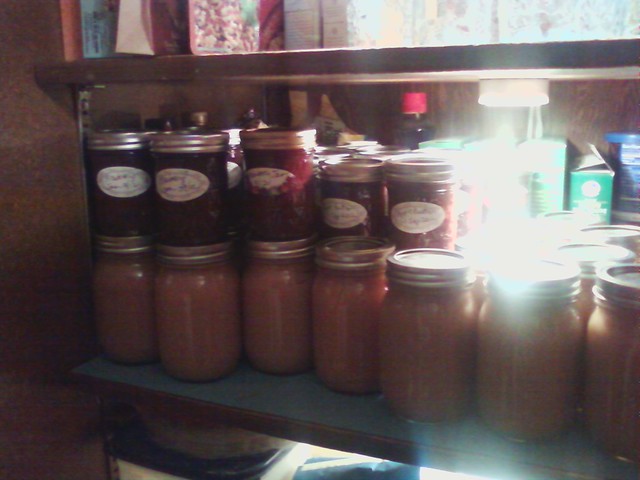
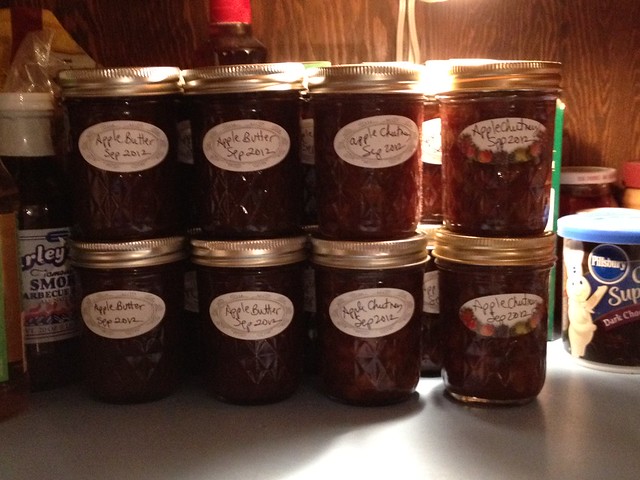
I cooled the jars on the rack overnight, then label and stored them in my pantry Sunday morning.
Next post on my apple harvest preservation journey: Apple Sauce
Moss Apple Tree (click image to see rest of album)
By the end of the first week of September, our apple tree had dropped several dozen apples. Everyday I went out to glean fallen ones and to pick fresh ones right off the branches. I had to do a bit of research to learn the proper way to pick an apple. By placing an apple gently in the palm of my hand and then twisting my wrist over, back towards the branch, a ripe apple would easily pop off the tree. I had six or seven dozen apples in baskets and other containers by the time I got home from work Friday evening.
I called my mom and asked her for her Apple Butter recipe. I looked through my old, dusty metal recipe box, where I thought I’d last seen her recipe. I looked through hundreds of yellowing recipe cards but couldn’t find the one I wanted. She couldn’t find her copy in her recipe box either. She would have to call me back. While I waited, I washed a couple of dozen apples to being peeling and coring in anticipation of receiving the recipe from mom.
Years ago, soon after we moved into our current home, I attended a Pampered Chef party and purchased several kitchen gadgets, including their Apple Corer/Peeler/Slicer contraption. For at least ten years, it has languished in the bottom of one of my kitchen drawers, underneath an old electric an opener and electric knife. I used it perhaps once or twice, but discovered that you can’t use it on store bought apples. Only fresh apples will peel, core and slice successfully. Terry helped speed up the process by manually peeling a few, which I would then afix to the gadget, retracting the peeling part so that it only cored and sliced the already peeled apple.
Mom found her recipe and finally called me, but the amount of spices listed for the amount of apples seemed a bit over the top. I modified the recipe somewhat. I already had two dozen apples chopped up and in my large crockpot, planning to slow cook the apple butter overnight and do the canning first thing Saturday morning.
Angie’s Apple Butter
16 c. thick apple pulp
1 c. vinegar
8 c. sugar
14 tsp. cinnamon
1/2 tsp. cloves
1/2 tsp. allspice
1/4 tsp. salt (optional)
I asked her twice about the cinnamon. I thought that was way out of proportion to the other ingredients. I ended up changing the above a bit, and if I do this again, I’m going to further refine the spices and sweetening.
Revised Apple Butter (first batch)
16 c. thick apple pulp
1 c. vinegar
4 c. white sugar
1 c. brown sugar
8 tsp. cinnamon
3 tsp. pumpkin pie spice (it’s what I had on hand in my spice rack)
Since Terry stays up most nights until three or four in the morning, I asked him to stir the crockpot every hour or so. By the time I woke up before six o’clock Saturday morning, the apple butter was thick and ready for canning.
I didn’t head off to bed right away though. I finished reading a book I started the previous weekend and then stepped outside to check the quality of seeing for astronomical observing. The evening was cool and clear so I decided to drag out Dob to search for Neptune. I somehow knocked the finderscope alignment out of whack and could not get it dialed in (something I need to do today during the daylight). I still managed to find the Andromeda Galaxy near the constellation Pegasus and M13, the Great Globular Cluster in the constellation Hercules. I tried, again, to find Neptune, sailing with the Water Bearer, Aquarius. Frustrated once again by the light pollution, I realized midnight was just minutes away. Time to hit the hay or the apple butter might boil away before I got it canned.
∞∞∞
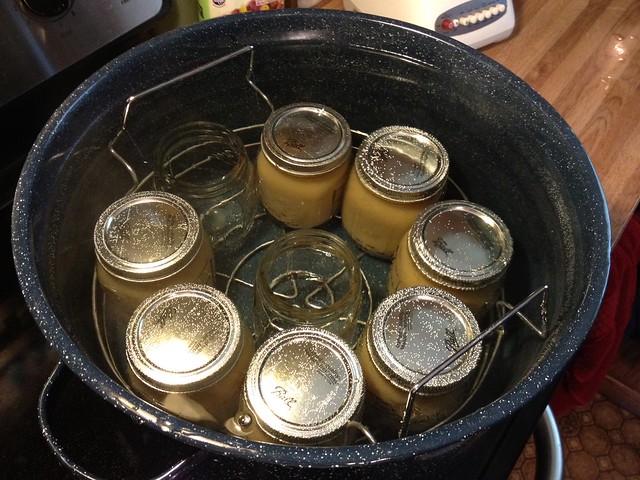
I lazed around in bed until after dawn. I checked the apple butter in the crockpot, using a whisk to smooth out the texture of the thickened mess. I placed the waterbath canner on the largest burner on my stove top, which probably only covered 75-80 percent of the bottom of the canner. I filled it half full of water and turned the burner on to medium-high heat.
Once the water warmed up a bit, I took the freshly washed half-pint jars from the dishwasher and slipped them into the canner. I turned up the burner a bit, to start a low boil. I placed the lids (but not the bands) in a separate smaller sauce pan and turned the high to medium-low. Per the instructions I read at Ball’s Getting Started web page at the FreshPreserving.com web site, I didn’t want to boil the lids as that might damage the seals before attaching them to the jars and securing them with the lids.
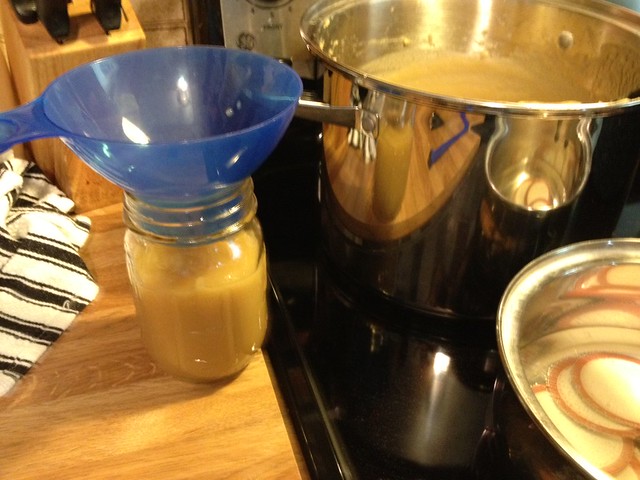
I used the jar lifter accessory to take the jars out of the canner, dumping the near boiling water back into the canner before gently setting the jar on the counter. I used the funnel accessory that came help get the apple butter into the jars. I used the magnet lifter to get the lids out of the small saucepan. I put the band over the lid and tightened it snugly, but not overly tight, per the instructions I read earlier.
I filled eight half-pint jars and got them evenly spaced around the inside of the canner. I removed the extra jars I didn’t need and let them cool down on a rack before putting the extra lids and bands on them for easy storage and future use. I cranked up the burner to high and waited for a roiling boil. Once the canner began boiling, I could set my kitchen timer to ten minutes and take a short break.
The timer buzzed and I turned off the burner. Using two pot holders and most of my sorry muscle power, I heaved the canner off the burner to the opposite corner of my range top. I removed the lid and set another timer for five minutes to allow the water and jars to start cooling off enough for me to remove them to the rack. I reviewed the post-processing directions (again) and made sure not to touch these jars for twelve hours.
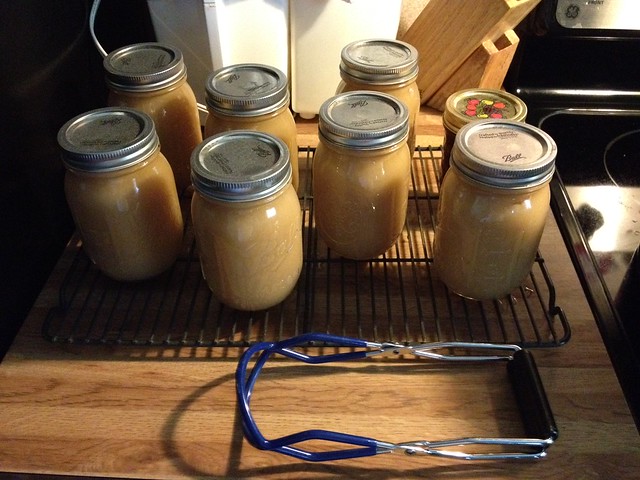
First batch of apple butter (click image for rest of album)
As I pulled them out of the water and placed them on the rack, most of their lids popped audibly. When I returned to check on them in a couple of hours, all eight of them had properly sealed. None of the lids would move up-and-down when I pressed on them. Success! My first ever effort to preserve something a complete success. And easier than I thought it would be.
Next post I’ll discuss processing another dozen or so apples into chutney.